Equalizer Settings
You can make equalizer settings for the 4 bands. The bands have different default frequency values and different Q names. However, they all have the same frequency range (20 Hz to 20 kHz). You can specify different filter types for each individual module.
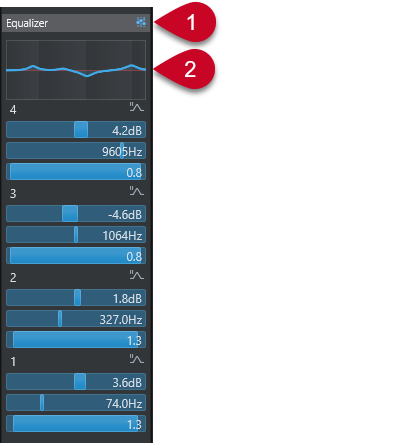
Equalizers Bypass on/off
Click to bypass all EQ bands.
Curve display
Click on the display in a channel to show a larger version. The display is also available in the EQ section of the track Inspector, in the Project window and in the Channel Settings window.
Clicking the curve display enlarges the view and shows a cross-hair cursor. The current mouse position shows the frequency, note value, offset, and level at the top or bottom of the display.
-
Click to add a curve point and activate the corresponding EQ band.
-
Double-click the curve point to deactivate it.
-
Drag the curve point up or down to adjust the gain.
-
Press Ctrl/Cmd to edit only the gain.
-
Drag left or right to adjust the frequency.
-
Press Alt/Opt to edit only the frequency.
-
Press Shift while dragging to set the Q-factor.
-
To invert the EQ curve, open the context menu, and select Invert EQ Settings.
The final curve shows the EQ settings as well as active high-cut and low-cut filters of the Pre section settings. Bypassed filter settings are shown in a different color than the active settings. Disabled filter settings are hidden from the display.
NoteYou cannot edit the high-cut and low-cut filters in the curve display. To edit the filters, open the Pre section.
-
Band Settings
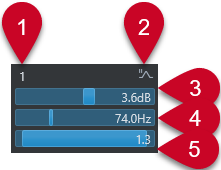
EQ Band on/off
Activates/Deactivates the equalizer band.
-
Select EQ Band Type
Opens a pop-up menu, where you can select an EQ type for the band. Bands 1 and 4 can act as parametric, shelving, or high/low-cut filters. EQ bands 2 and 3 are always parametric filters.
Gain
Sets the amount of cut or boost. The range is ±24 dB.
Frequency
Sets the center frequency of the frequency range to be cut or boosted. You can set the frequency either in Hz or as a note value. If you enter a note value, the frequency is automatically displayed in Hz. For example, a note value of A3 sets the frequency to 440 Hz. When you enter a note value, you can also enter a cent offset; for example, A5 -23 or C4 +49.
NoteEnter a space between the note and the cent offset. Otherwise, the cent offsets are not taken into account.
Q-Factor
Determines the width of the affected frequency range. Higher values result in narrower frequency ranges.