Changing the margins above/below flow headings
You can change the margins both above and below flow headings, which control the gap between the preceding flow and the flow heading, and the gap between the flow heading and the start of the next flow.
Prerequisite
Flow headings are shown in the layouts in which you want to change the margins above/below flow headings.
Procedure
- Press Ctrl/Cmd-Shift-L to open Layout Options.
-
In the Layouts list, select the layouts in which you want to change the margins above/below flow headings.
By default, the layout currently open in the music area is selected when you open the dialog. You can select other layouts by using the selection options in the action bar, Shift-clicking adjacent layouts, and Ctrl/Cmd-clicking individual layouts.
- Click Page Setup in the category list.
- In the Flows section, change the values for Flow heading top margin and/or Flow heading bottom margin.
- Click Apply, then Close.
Result
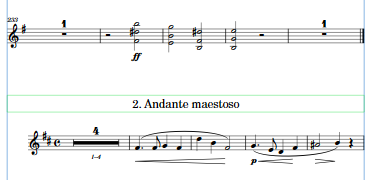
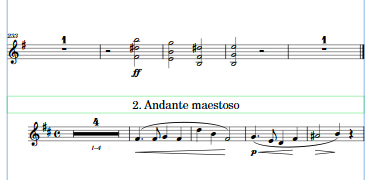
Changing the value for Flow heading top margin increases/decreases the gap between the top of flow headings and the end of the preceding flow.
Changing the value for Flow heading bottom margin increases/decreases the gap between the bottom of flow headings and the start of the next flow. For example, when the bottom margin is set to 0, the bottom of the lowest frame in the flow heading aligns with the top staff line of the first system in the flow below the flow heading.
-
If you want to change the margins above/below an individual flow heading, you can do this by inserting a flow heading change and changing the margins at the change.
-
If you want to move individual flow headings upwards/downwards, you can do this by moving the system handle of the first system of the flow to which the flow headings apply. You can also move the frames in flow headings individually, but this creates a master page override, preventing Dorico Pro from updating the page if, for example, you later change the master page format.
Example

|

|